Indulgent and spectacularly easy to make from scratch, these classic molten chocolate lava cakes feature rich, soft chocolate cake giving way to a luscious, gooey, molten chocolate center with every spoonful. If you have already mastered our Perfect Fluffy Pancakes for breakfast, these cakes are the ultimate way to bookend your day with a gourmet dessert. They’re single-serve, individually baked, and offer an irresistible contrast of delicate cake exterior and silky-smooth, warm chocolate “lava” inside.
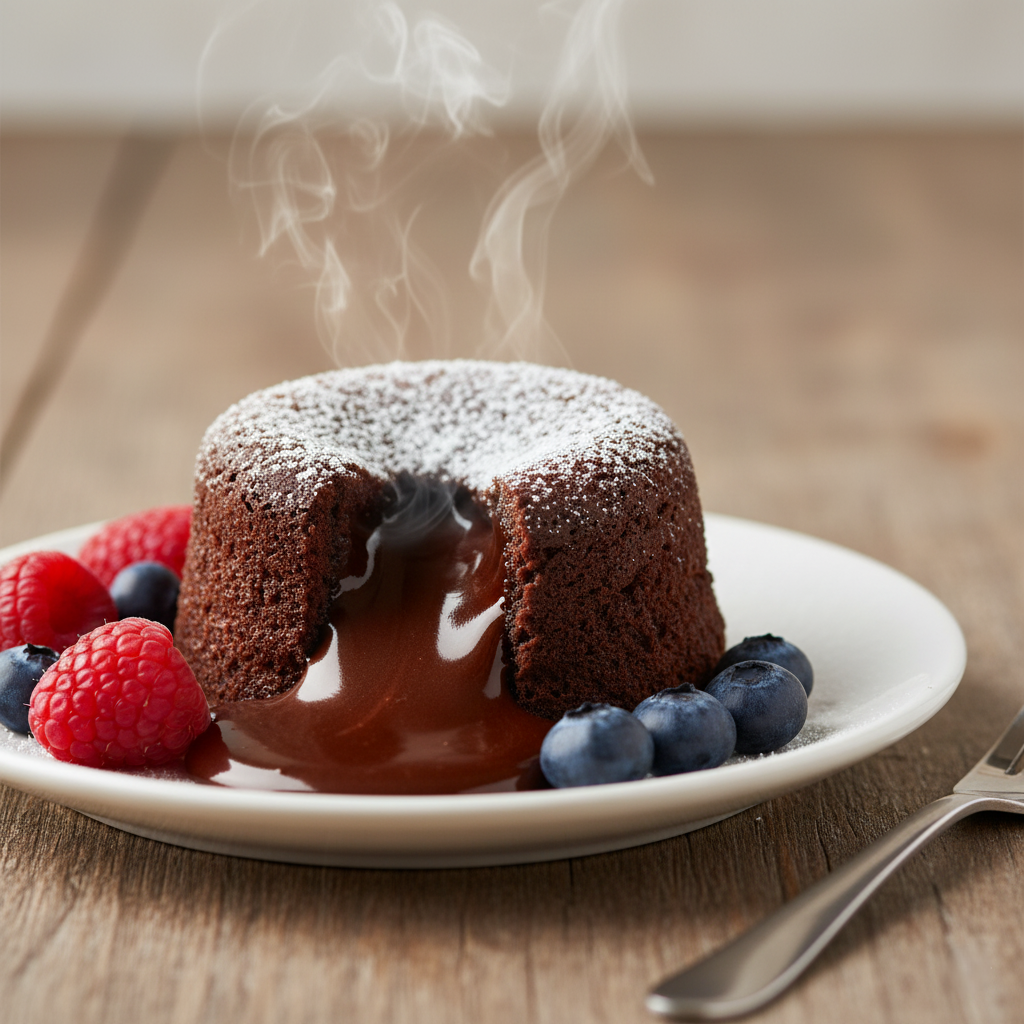
Table of Contents
Why This Recipe Works
Lava cakes succeed through a playful combination of a hot, slightly underbaked center and deeply flavorful chocolate. The ingredients are simple: real chocolate, butter, eggs, and sugar. We recommend using high-quality dark chocolate not just for the intense flavor, but to take advantage of the Flavanols and antioxidants in dark chocolate. Best of all, you can go from intense chocolate craving to a finished, restaurant-quality dessert in under 30 minutes.
Ingredients You’ll Need
- ½ cup (113g) unsalted butter, plus extra for thoroughly greasing ramekins so the cakes release cleanly
- 6 oz (170g) high-quality bittersweet or semisweet chocolate, chopped—bars preferred for smoothest melting and richest flavor
- 2 large eggs, brought to room temperature for best volume and texture
- 2 large egg yolks, separated and lightly beaten (these give extra richness and that signature lava texture)
- ¼ cup (50g) granulated sugar
- ⅛ tsp fine sea salt or kosher salt
- 2 tbsp (14g) all-purpose flour, just enough to hold the cakes’ shape around the molten centers
- Optional: for finish, powdered sugar, fresh berries, whipped cream, or vanilla ice cream

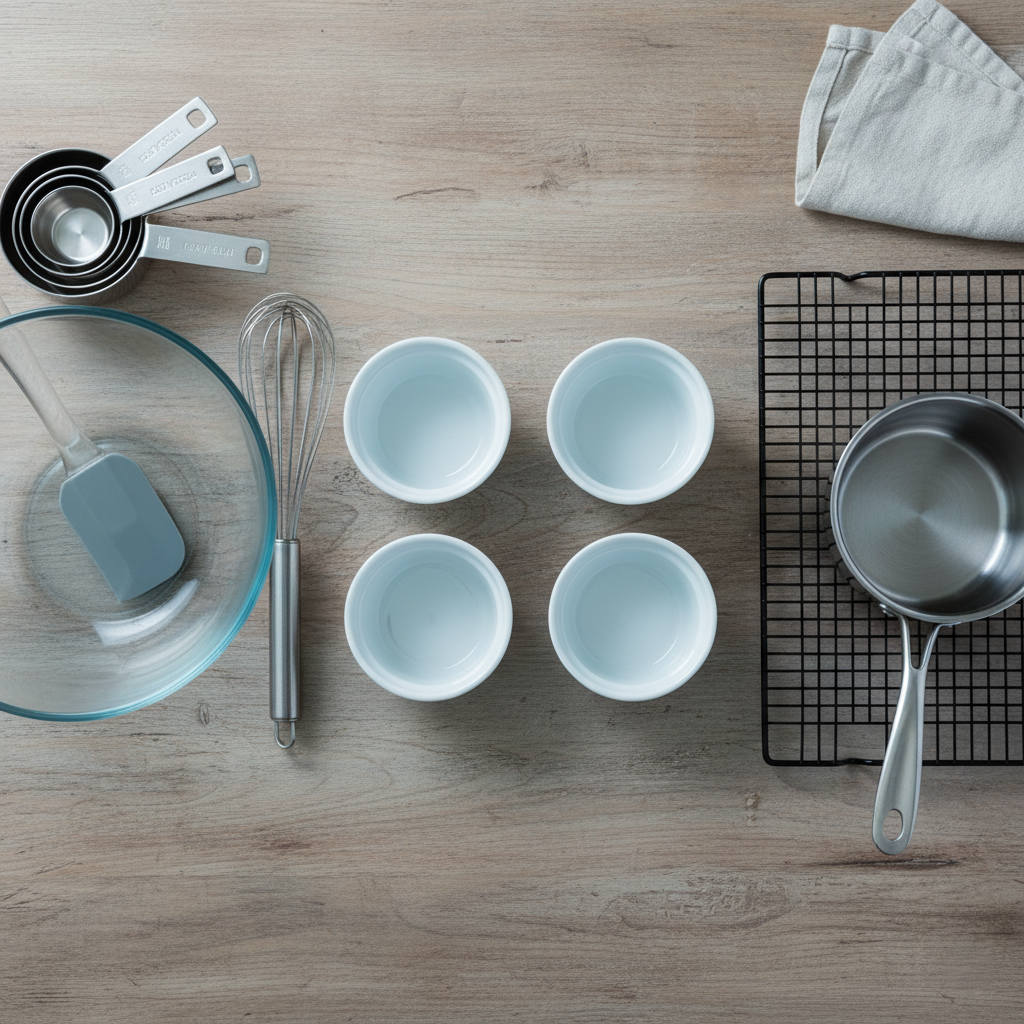
Equipment Needed
- 4 (4oz) oven-safe ramekins, thoroughly buttered and dusted with flour to prevent sticking
- Baking sheet for easy transfer in and out of the oven and even baking
- Mixing bowls: at least one large for eggs, one medium for chocolate
- Whisk and flexible rubber spatula for folding batter smoothly
- Small saucepan or a microwave-safe bowl for melting chocolate and butter together gently
Step by Step Instructions:
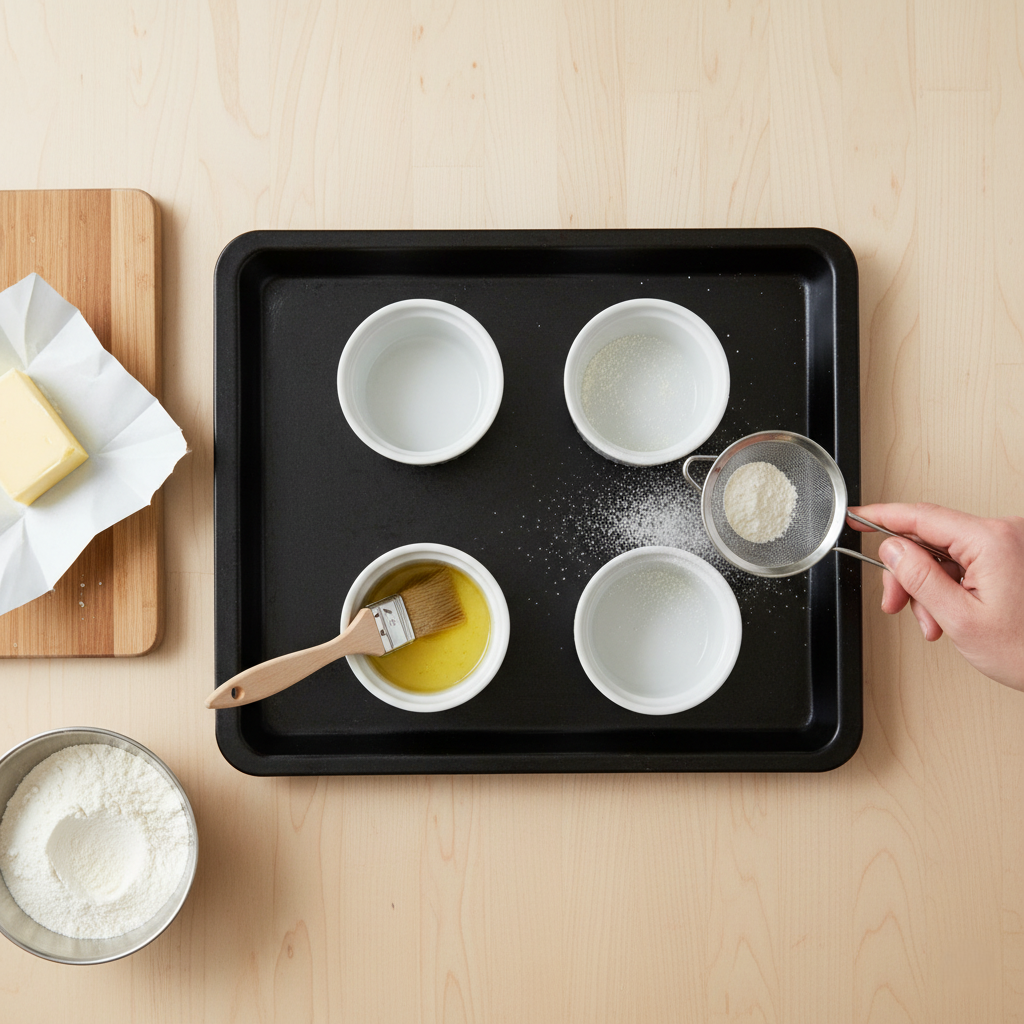
1. Prepare the Ramekins
Generously butter and lightly flour 4 (4oz) ramekins, including the sides, to help the baked cakes release cleanly and hold their shape when unmolded. Tap out any excess flour. Arrange prepared ramekins on a baking sheet for stability during baking and easy movement. Preheat oven to 450°F (232°C) at least 15 minutes ahead so it’s fully hot when the batter is ready—high heat is what sets the cake exterior while leaving the centers molten and gooey.
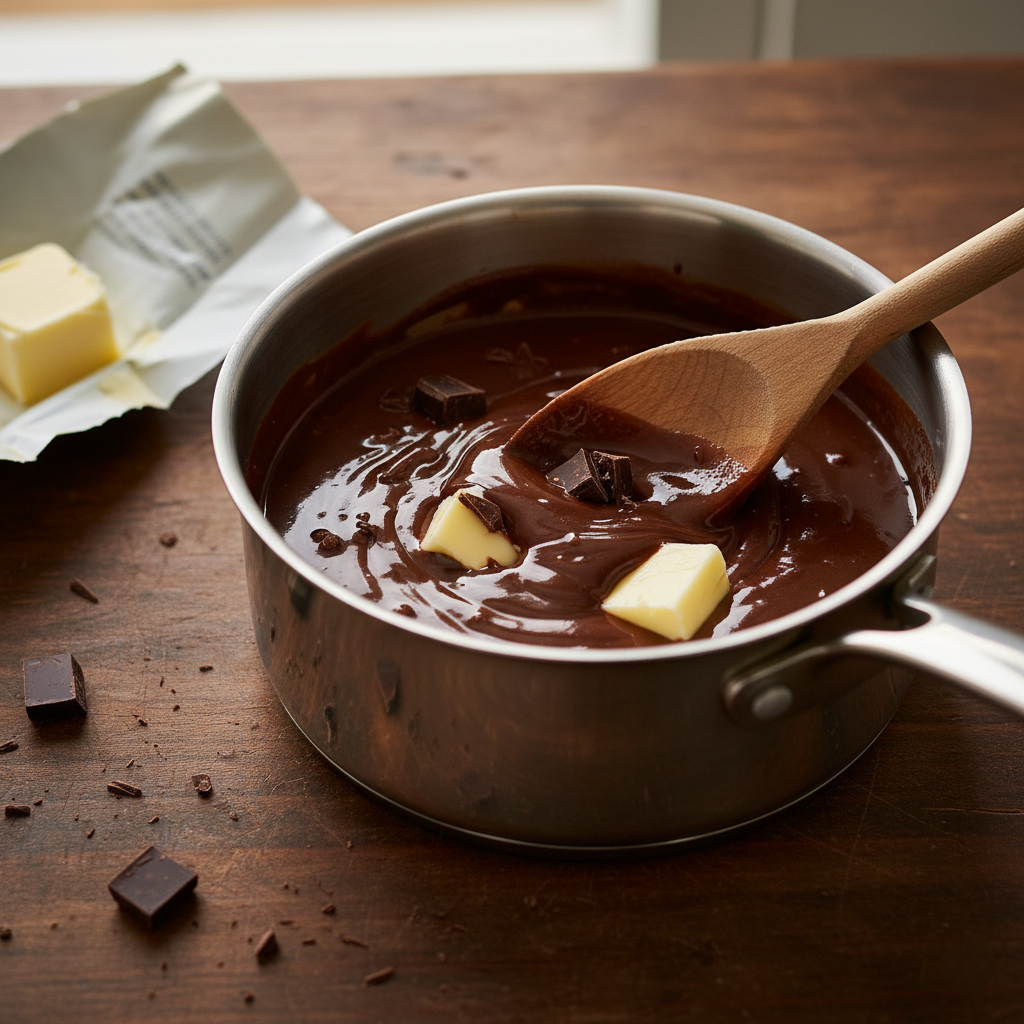
2. Melt Butter and Chocolate
Place butter and chocolate pieces in a heatproof bowl. Set over a saucepan of gently simmering water (double boiler) or in the microwave at medium power in 20-30 second bursts. Stir frequently until completely melted and very smooth—avoid overheating, as burning chocolate will change the taste. Set aside to cool for 2-3 minutes so it doesn’t scramble the eggs in the next step. This mixture should be glossy, dark, and pourable.
3. Beat Eggs and Sugar
In a large mixing bowl, vigorously whisk together whole eggs, egg yolks, sugar, and salt until the mixture is very pale, thickened, and ribbons off the whisk—this adds air, ensuring tender and light cake texture on the outside. You can do this by hand (about 2-3 minutes) or with an electric mixer on medium-high speed for 1-2 minutes.

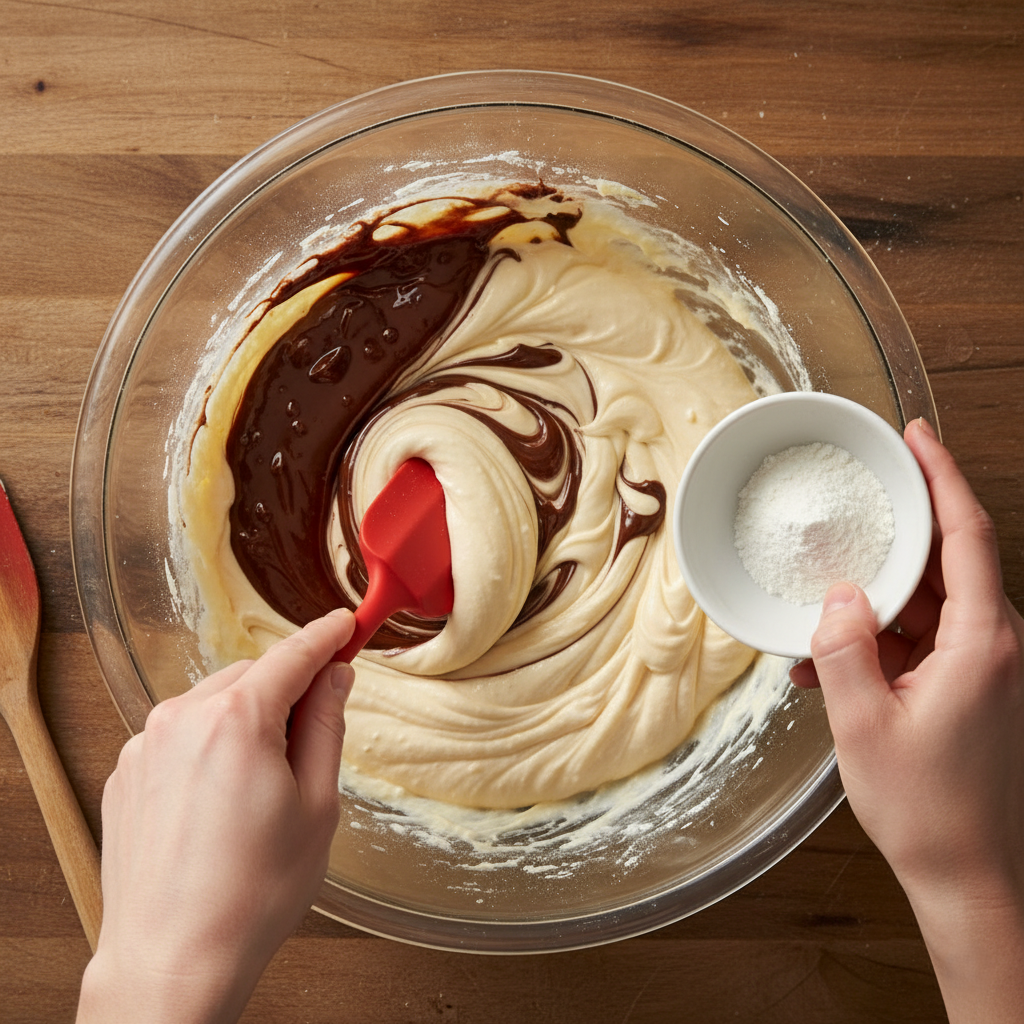
4. Combine and Add Flour
Pour the slightly cooled melted chocolate-butter mixture into the egg base. Gently fold together with a spatula, using sweeping motions to avoid deflating the eggs. Sift the flour over the batter, then fold again until no streaks remain and you have a smooth, velvety chocolate batter. Don’t overmix—which can toughen your cakes—just ensure the flour is fully incorporated and the color is even throughout.
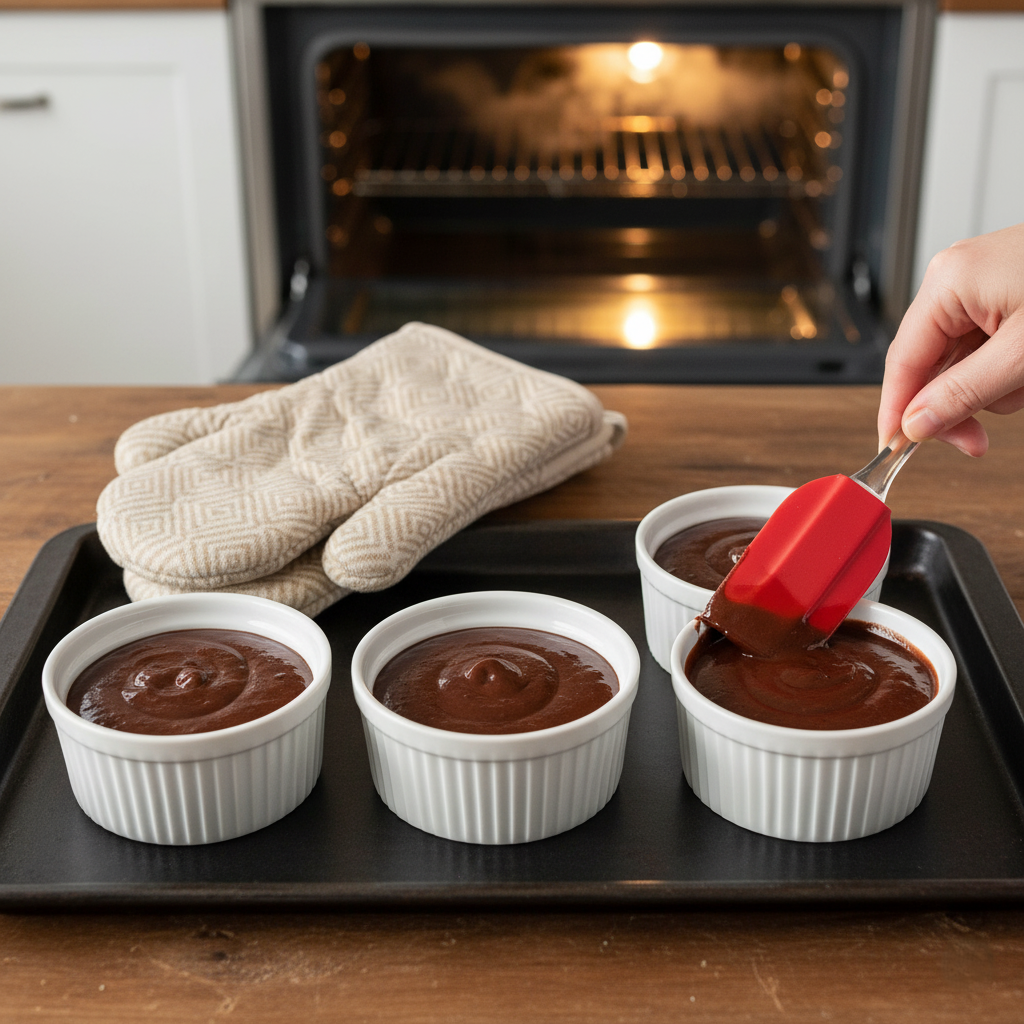
5. Fill and Bake
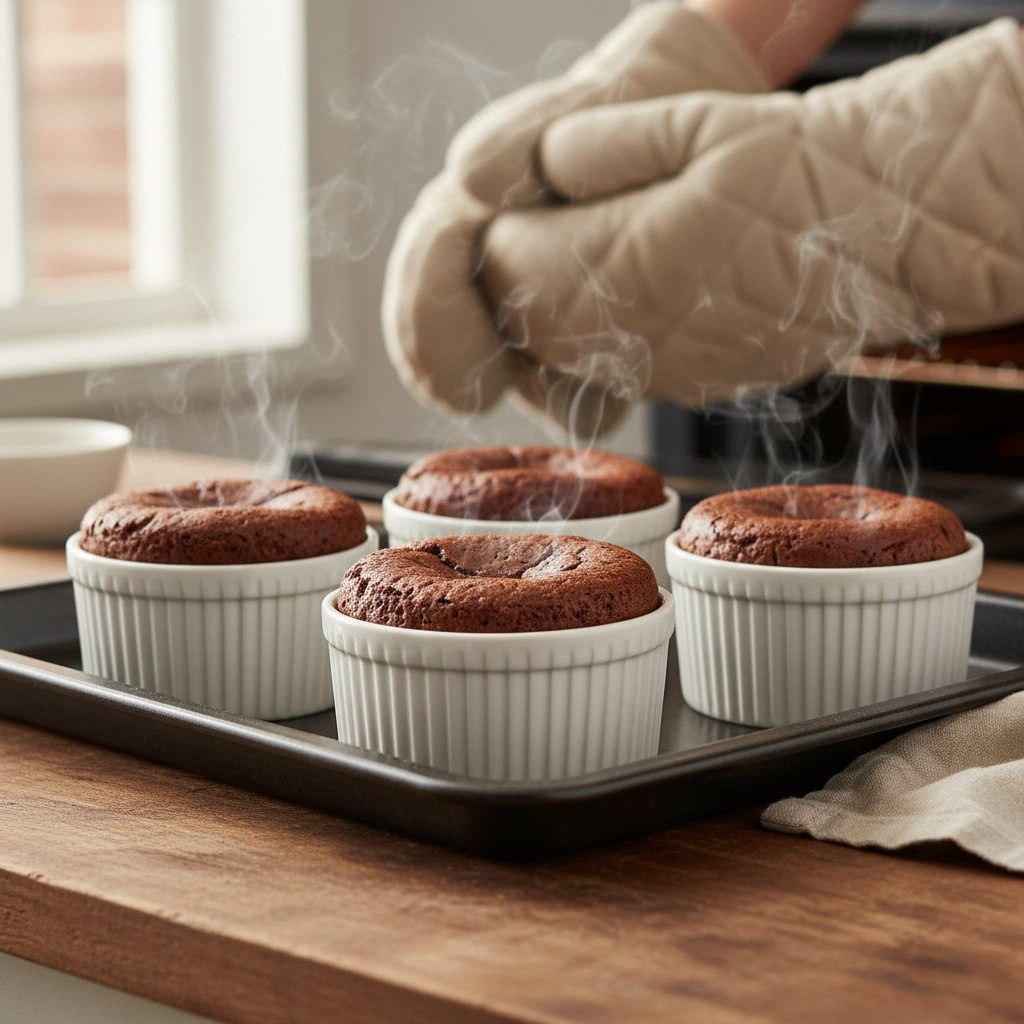
Divide the chocolate batter equally among prepared ramekins, filling each a little over halfway for optimal rise and gooey center. Gently tap each ramekin on the counter to release air bubbles. Place on the baking sheet and bake in the fully preheated oven for 7–9 minutes. The edges will look puffed and set, while the centers remain soft and jiggly; if slightly underbaked, that’s perfect—the signature lava flow will await inside. For a thicker “lava” center, err on the lower end of the baking range.
6. Unmold and Serve
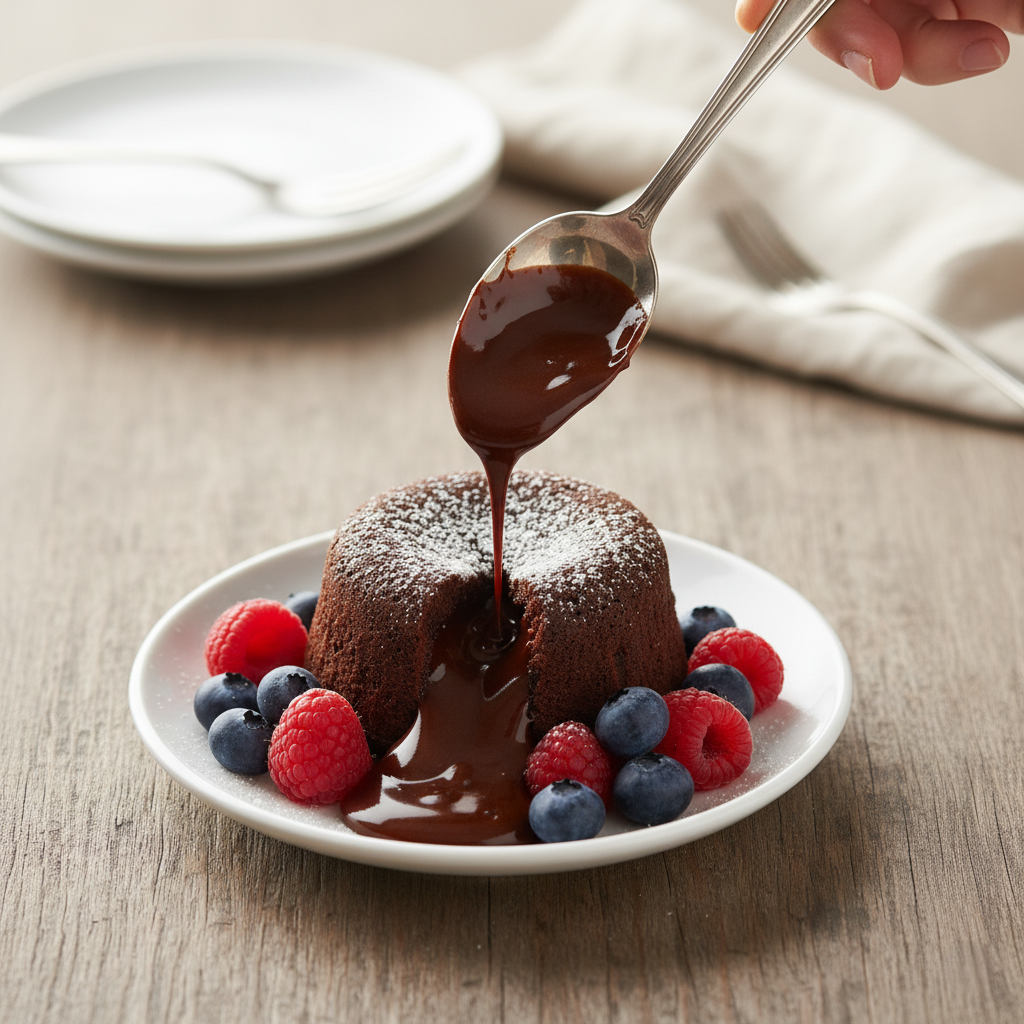
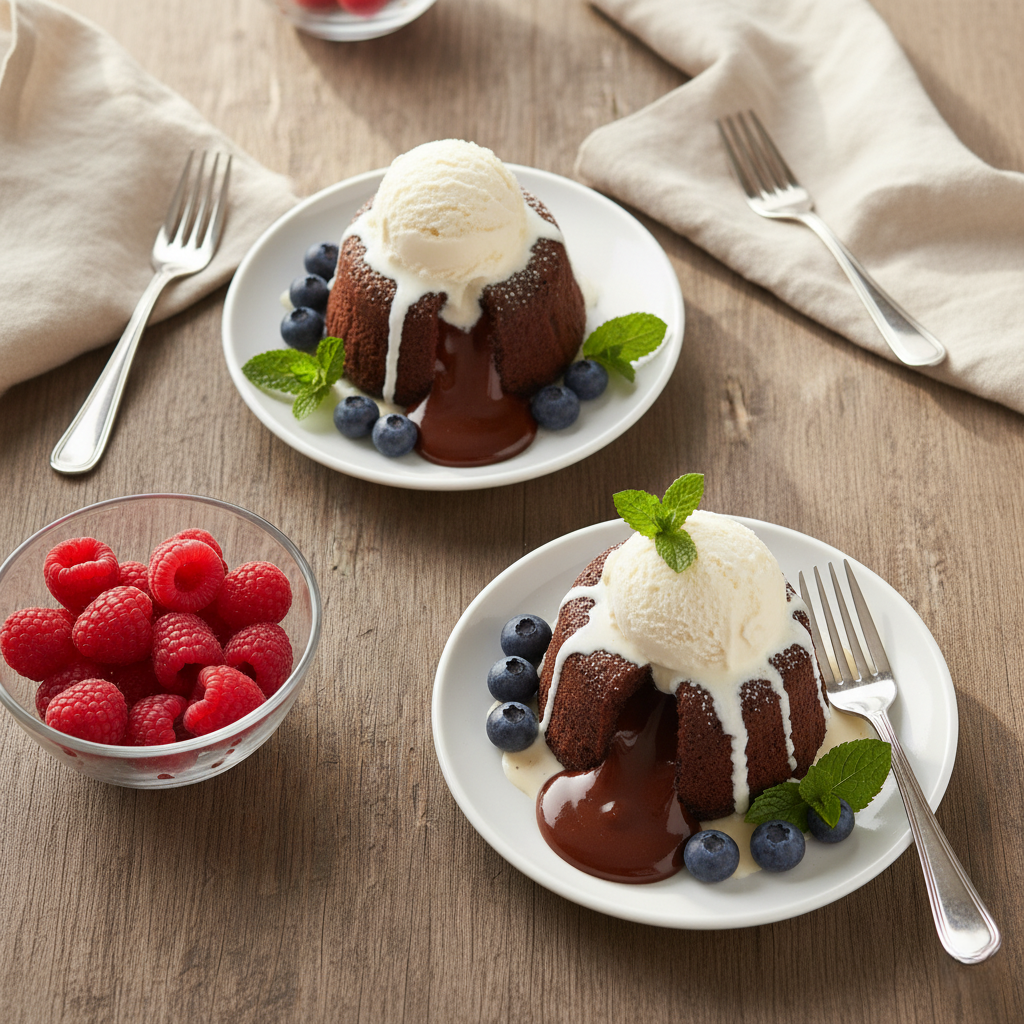
Let cakes cool in their ramekins for 1–2 minutes so they’re firm enough to unmold without collapsing. Carefully run a small knife around the edges. Invert a dessert plate over each ramekin, flip everything over, and lift away the ramekin to reveal the gooey cake. Immediately dust with powdered sugar, adorn with fresh berries or a scoop of vanilla ice cream, and enjoy the dramatic molten chocolate moment while hot. If serving later, unmold and microwave for 10 seconds before garnishing.
Tips & Variations
- Add ½ tsp instant espresso powder to the batter for deeper, more complex chocolate flavor.
- Just before baking, sprinkle a tiny pinch of coarse sea salt on each cake for a sweet-and-salty twist that heightens the chocolate intensity.
- Customize toppings: drizzle with warm caramel, sprinkle with nutty praline, or finish with orange zest or flaky sea salt.
- Adapt bake time to taste: pull at 7 minutes for extra “lava” or closer to 9 for barely gooey centers; temperature and ramekin thickness can affect results.
- Pair with whipped cream, classic vanilla ice cream, or fresh raspberries for an elegant restaurant-style plating—and added contrast of cold and hot.
FAQs
Q: Can I make lava cake ahead of time?
A: Yes! You can fully prep and portion the batter in the ramekins, cover with plastic wrap, and refrigerate for up to one day in advance. When ready to serve, bake directly from cold, adding 1–2 minutes to the usual baking time for the same perfect molten center.
Q: What kind of chocolate is best?
A: High-quality baking bars of bittersweet (60%–70%) or semisweet chocolate melt the smoothest and yield the richest, deepest chocolate flavor. Avoid chocolate chips if possible, as they include stabilizers and may not provide the same decadent lava texture.
Q: How do I know if it’s done?
A: The sides and top of the cake will look puffed, matte, and just pulled from the edges of the ramekin, but the center should still look moist, shiny, and jiggle when gently shaken. Err on the side of underbaking—the interior continues to set as it cools, preserving that signature lava flow.
Q: Can I freeze lava cakes?
A: Absolutely! Assemble the batter in ramekins, wrap tightly with plastic and foil, and freeze unbaked for up to two weeks. Bake straight from the freezer, adding 2–3 minutes to the cook time—the outside will set, the centers stay molten, and you get oozy lava on demand.
Conclusion
There is no dessert quite as impressive as a warm lava cake, yet it remains surprisingly simple to prepare. By choosing quality ingredients, you treat yourself to a decadent experience that also offers the natural Flavanols and antioxidants in dark chocolate.
Once you see how easy it is to create bakery-quality sweets at home, you might be inspired to tackle other favorites. Be sure to try our Perfect Fluffy Pancakes next time you want to impress the family with a classic comfort food made from scratch.